
Slimbox 2 is a JavaScript file that uses the JQuery JavaScript library to display your images in a really neat way.
Slimbox uses the popular JavaScript framework JQuery. The first step is to download the lightweight version of JQuery from their site.
The next step is to download the Slimbox 2 files.
The download for the Slimbox 2 is a zip file. It contains some documentation, along with all of the files you need to make it work. Unzip the Slimbox File. Find the file called slimbox2.js. It should be inside the the js folder.
It's customary to put JavaScript files in a folder called js on websites, so we'll make that folder in our site and copy both the JQuery and Slimbox2 JavaScript files into it.
You're js folder should look something like the image on the right. The version numbers in your files names might not be exactly the same as mine are.
Next we need to link those two Javascript files into HTML page that we want to use Slimbox in.
The two script tags should go in the header of the document. Make sure the jquery one comes first. Also note that your file names might be slightly different.
<!DOCTYPE html PUBLIC "-//W3C//DTD XHTML 1.0 Strict//EN"
	"http://www.w3.org/TR/xhtml1/DTD/xhtml1-strict.dtd">
<html xmlns="http://www.w3.org/1999/xhtml" xml:lang="en" lang="en">
<head>

  <script type="text/javascript" src="js/jquery-1.3.2.min.js"></script>
  <script type="text/javascript" src="js/slimbox-2.02.js"></script>

</head>
Slimbox 2 requires it's own CSS code in order to display things properly. There are also a few images that are required as well.
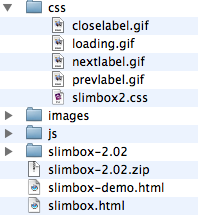
Find the CSS folder inside the slimbox folder you downloaded. There should be five files in it:
Copy all five of these files to your own CSS folder. It should look like the image on the right.
<!DOCTYPE html PUBLIC "-//W3C//DTD XHTML 1.0 Strict//EN"
	"http://www.w3.org/TR/xhtml1/DTD/xhtml1-strict.dtd">
<html xmlns="http://www.w3.org/1999/xhtml" xml:lang="en" lang="en">
<head>

  <script type="text/javascript" src="js/jquery-1.3.2.min.js"></script>
  <script type="text/javascript" src="js/slimbox-2.02.js"></script>

  <link rel="stylesheet" href="css/slimbox2.css" type="text/css" media="screen" />
</head>
The goal here is to show a thumbnail image, or group of thumbnails, and then have them link to the full size image.
In order for this to work, you must have all of your full size images ready in web format. You should then decide on a thumbnail size and prepare a thumbnail for each of your images.
You should save all of the images in your images folder.
The neat part about this kind of thing is that we don't have to do very much to our HTML in order for slimbox to work.
You can use whatever tags suit the context of your HTML. All that really matters, is that you have a thumbnail image, wrapped with a link to the full file.
<a href="images/full-size.png">
  <img src="images/thumbnail.png" alt="remember your alt tag" />
</a>
Next you have to add one more thing to trigger lightbox. You need to add the rel attribute to the anchor tag, and make sure that it's value includes the word "lightbox".
<a href="images/full-size.png" rel="lightbox" >
  <img src="images/thumbnail.png" alt="remember your alt tag" />
</a>
If you want to use Slimbox with a group of pictures (see demo), you need to include a common group name in the rel attribute value.
<a href="images/full-size1.png" rel="lightbox-cats" >
  <img src="images/thumbnail1.png" alt="remember your alt tag" />
</a>
<a href="images/full-size2.png" rel="lightbox-cats" >
  <img src="images/thumbnail2.png" alt="remember your alt tag" />
</a>
<a href="images/full-size3.png" rel="lightbox-cats" >
  <img src="images/thumbnail3.png" alt="remember your alt tag" />
</a>With Slimbox you can also include a caption to be displayed in the popup menu.
This is done by adding the caption to the a tag as a title attribute. So, the value of your title attribute is the caption of the image in the popup window.
<a href="images/full-size.png" rel="lightbox" title="This Is My Image Caption" >
  <img src="images/thumbnail.png" alt="remember your alt tag" />
</a>
That's all you need for your basic Slimbox 2 implementation. For the more adventurous folk, the Slimbox website and documentation contains all sorts of extra features that you can use tweak things.