In print you often use high resolution images and save them in file formats like TIFF or PSD. This results in print-quality graphics, but very large files.
On the web all images and files associated with a web page have to be downloaded to the client computer before they can display. The larger the file size, the more time it will take the graphics to download and display. In order to make our web pages fast, we minimize the file size of all of our graphics (which are by far the largest part of our web pages).
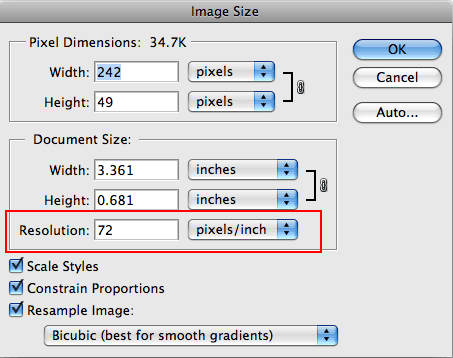
Always set your images to 72 ppi.
In Photoshop, you can set the resolution for your images by going to Image > Image Size. The resolution should be set to 72 Pixels per Inch, as shown in the screen shot.
File sizes are measured in bytes (B), kilobytes (kB), megabytes (MB) and gigabytes (GB). 1 byte is the smallest unit of measurement for computer storage.
How large should the file sizes of our images be? That depends on the dimensions of the image and the type of image.
Guidelines (for 2010)
All images should be optimized before we use them in our websites. In Photoshop, we use the Save for Web & Devices command.
Digital cameras usually save photos at a much higher resolution and size than we need.
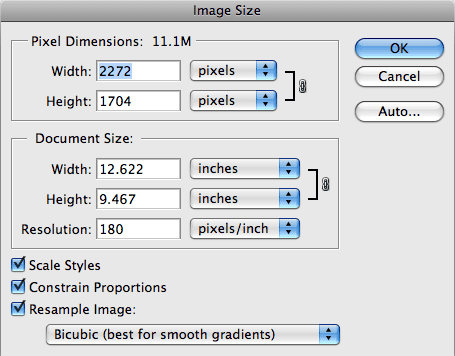
Here's a photo of Molly from a digital camera.
This photo is huge. It's 2.5 MB. It has a 180 ppi resolution and is 2272x1704 pixels!
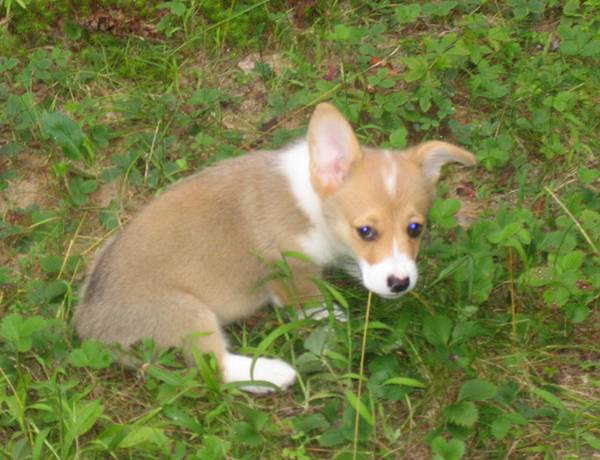
Let's crop and resize Molly using the Image Size menu in Photoshop. We'll bring her down to 72 ppi and a width of 600px, which is still quite large.

We just did a normal save in Photoshop. This photo is still 396kB. Way too big.
Next we'll optimize Molly by using the Save for Web & Devices menu in Photoshop.
This is a photograph with continuous tones, so it should be a JPG. We can use the Photoshop presets for JPG. JPEG Medium looks good, so we'll use that.
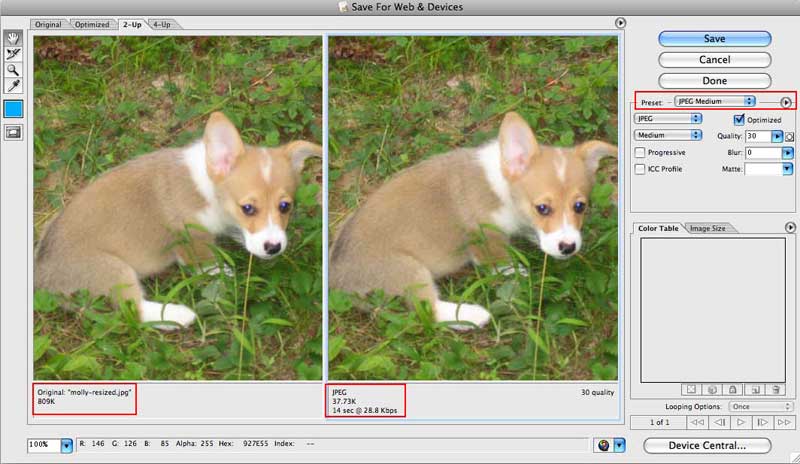
Now the photo of Molly is only 40kB. That's still pretty big, but the photo is 600px wide, so that's ok.
To create images with transparency, you must first create an image in Photoshop that has some transparency. The image below, has a transparent background (as we can see from the checkerboard pattern).
![]()
In order to preserve the transparency, we must save the image as a GIF or a PNG.
To save using a one color transparency, do the following on the Save for Web & Devices screen:
![]()
To save using a variable transparency, do the following on the Save for Web & Devices screen:
![]()