In print you often use high resolution images and save them in file formats like TIFF or PSD. This results in print-quality graphics, but very large files.
On the web all images are measured in pixel size.
Resolution actually does not matter. Just pixel size.
Resolution actually does not matter.
All files associated with a web page have to be downloaded to the client computer before they can display. The larger the file size, the more time it will take the graphics to download and display.
In order to make our web pages fast, we minimize the file size of all of our graphics (which are by far the largest part of our web pages).
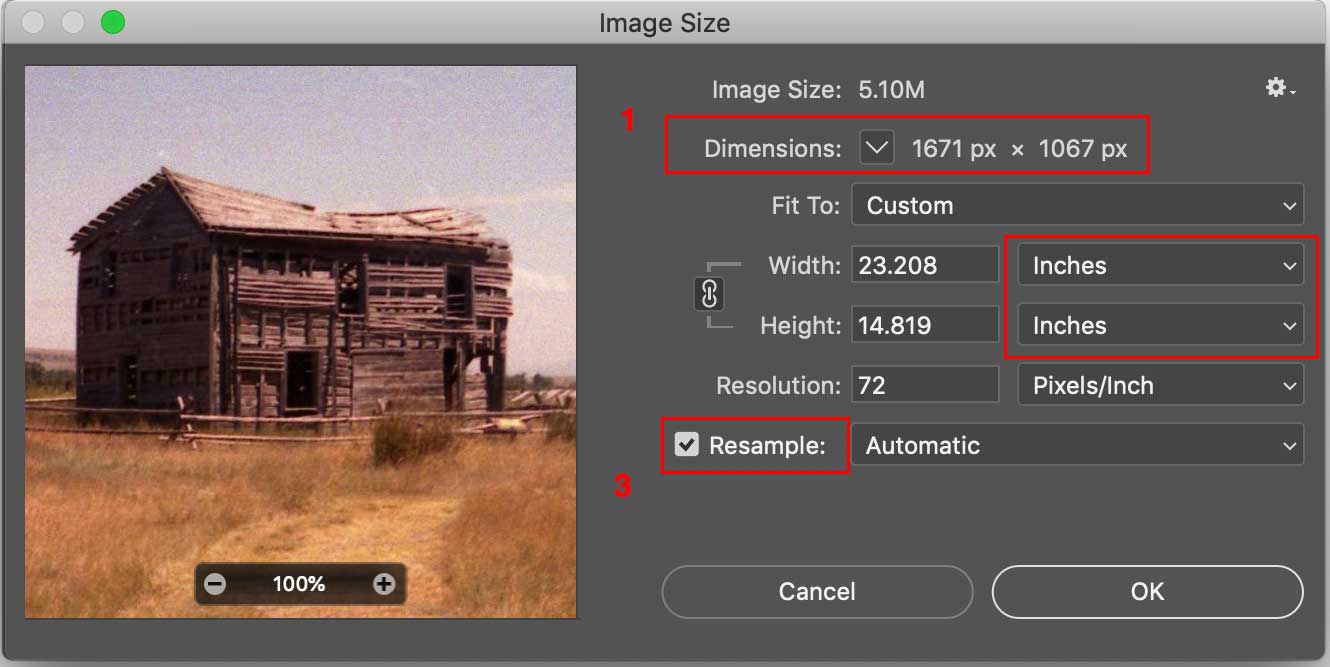
In Photoshop:
You can see this information by going to Image > Image Size.
How large should the file sizes of our images be? That depends on the dimensions of the image and the type of image.
Guidelines
All images should be optimized before we use them in our websites. In Photoshop, we use the Save for Web command.
Digital cameras and phones usually save photos at a much higher resolution and size than we need on the web.
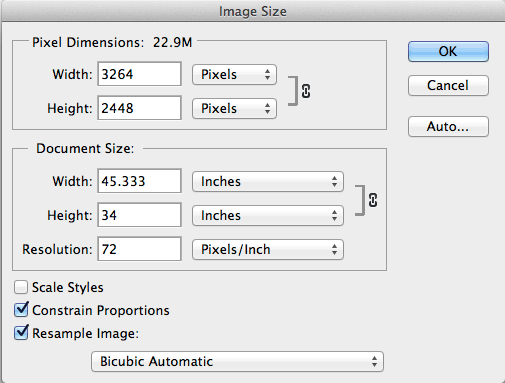
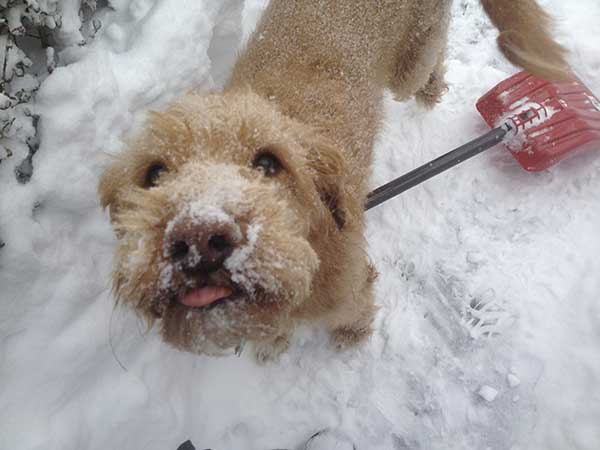
Here's a photo of Petey I took on my iPhone (not even the latest and greatest one).
This photo is huge. It's 2.1 MB and 3264x2448 pixels! Notice how it doesn't even fit in the browser window.
Let's crop and resize Petey using the Image Size menu in Photoshop. We'll trim him down to a width of 600px, which is still quite large.
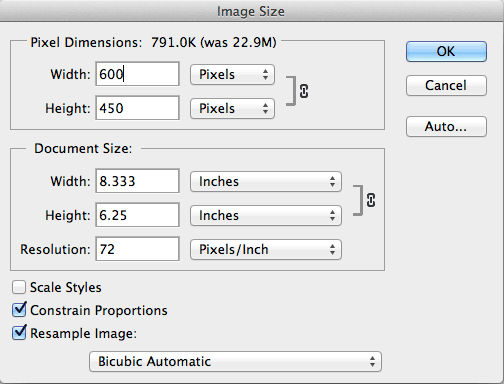
We just did a normal save in Photoshop. This photo is still 327kB. Way too big.
Next we'll optimize Petey by using the Save for Web menu in Photoshop.
The save for web menu allows you to compare multiple versions of the same image saved in various formats and compression settings. Note the photo size estimates outlined in the two red boxes on the left of the screenshot below.
The preset menu on the right allows you to pick from a few common predefined file formats and settings.
This is a photograph with continuous tones, so it should be a JPG. We can use the Photoshop presets for JPG. JPEG Medium looks good, so we'll use that.

Now the photo of Petey is only 28kB. That's still kind of big, but the photo is 600px wide, so that's ok.
To create images with transparency, you must first create an image in Photoshop that has some transparency. The image below, has a transparent background (as we can see from the checkerboard pattern).
![]()
In order to preserve the transparency, we must save the image as a GIF or a PNG.
To save using a one color transparency, do the following on the Save for Web screen:
![]()
To save using a variable transparency, do the following on the Save for Web screen:
![]()
You can use other image compression tools that will compress images even more than Photoshop does.
There are free online services like Tiny PNG.
Our lab computers also have a free application called ImageOptim in the Applications folder.
Just drag your finished photos into the app to further optimize.